如何构建和发布 npm 包到 GitHub Package Registry?
本文将指导您在 GitHub Packages 上构建和发布 npm 到 GPR。
- npm:全称 Node Package Manager,NodeJs 包管理和分发的工具。
- GPR:全称 GitHub Package Registry,托管和管理软件包的平台,为常用包管理器提供不同的包仓库,如:npm、RubyGems、Apache Maven、Gradle、Docker 和 Nuget。GitHub 的 Container Registry 针对容器进行了优化,支持 Docker 和 OCI 镜像。
前提条件
- 一个 npm 账号(npmjs.com)
- 一个 GitHub 仓库
- 了解 GitHub 和 Git 命令
- GitHub Actions、CI/CD 和 YAML 的基础知识
操作步骤
Step 1:生成 GitHub token
- 登录 GitHub
- 点击头像
- 点击 Settings
- 点击 Developer settings
- 展开 Personal access tokens
- 点击 Tokens(classic)
- 点击 General new Token
- 点击 General new token(classic) 创建 token
- 设置 GitHub token 的权限:
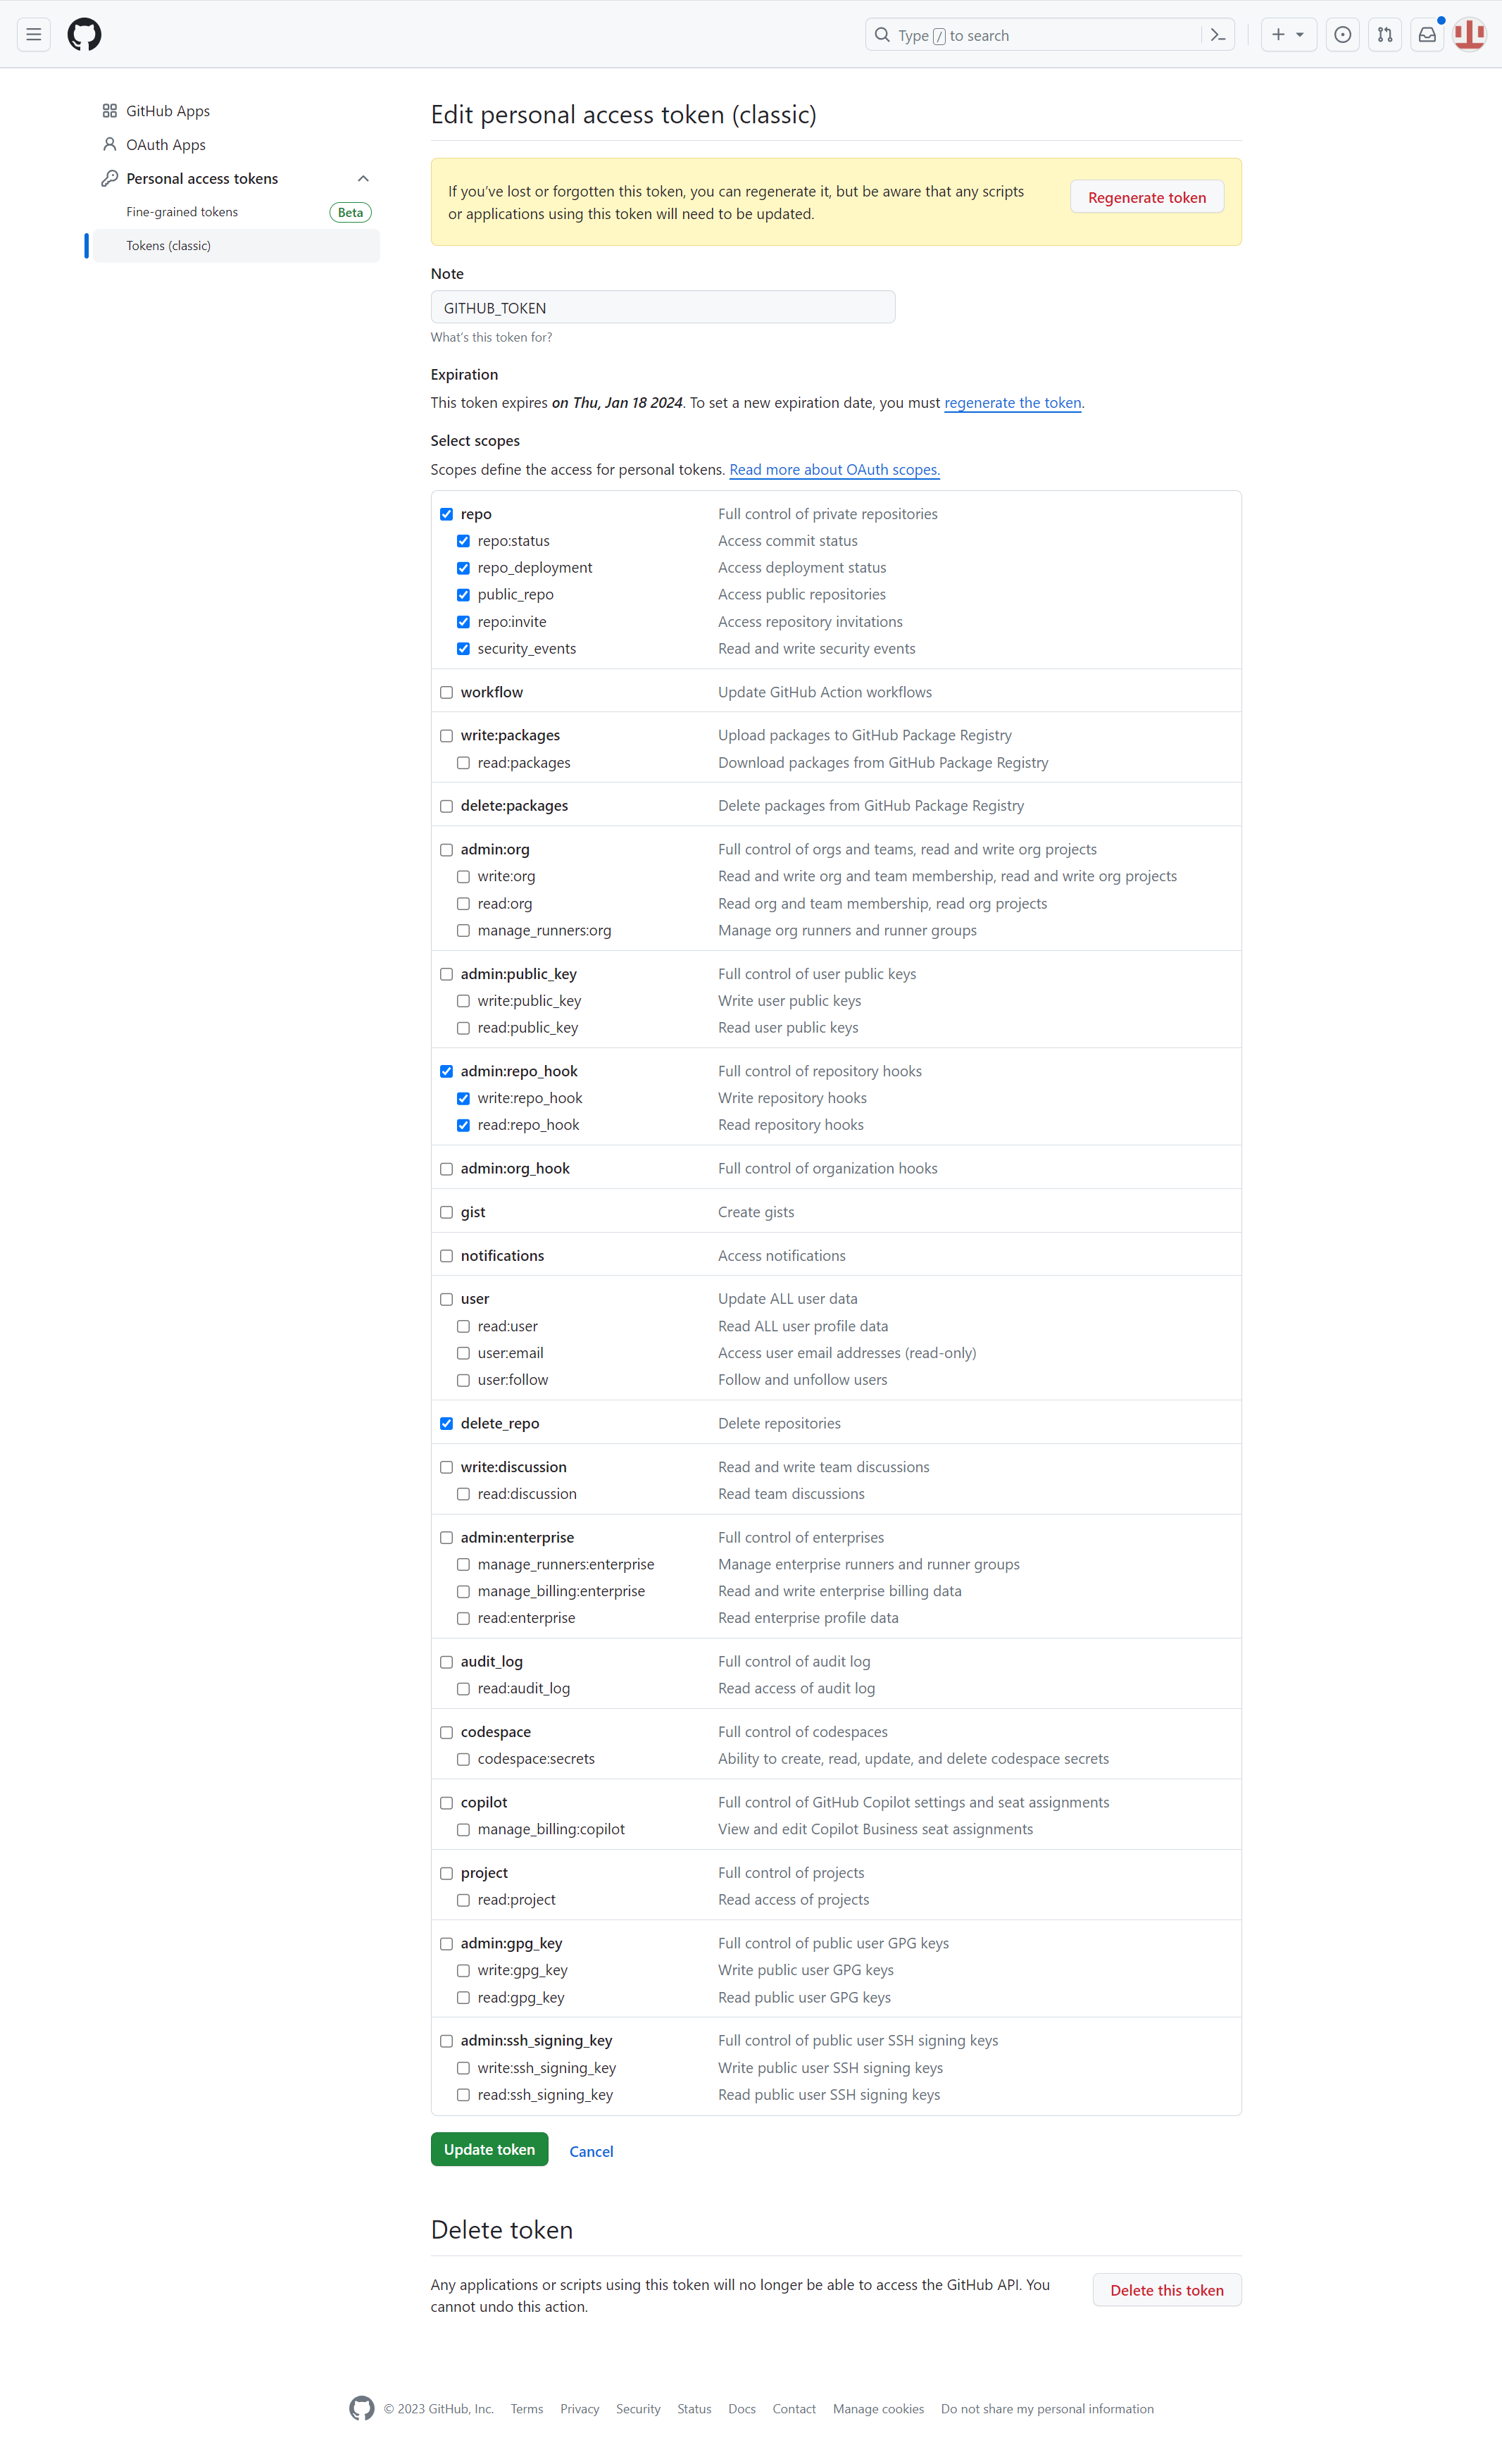
- 勾选 repo 下所有权限
- 勾选 admin:repo_hook 下所有权限
- 勾选 delete_repo 下所有权限
Step 2:创建库
使用 GitHub REST API 创建库,请将 <TOKEN> 替换为你的 GitHub token:
1
2
3
4
5
6
7
$ curl -L \
  -X POST \
  -H "Accept: application/vnd.github+json" \
  -H "Authorization: Bearer <TOKEN>" \
  -H "X-GitHub-Api-Version: 2022-11-28" \
  https://api.github.com/user/repos \
  -d '{"name":"publish-to-gpr","description":"使用 GitHub Actions 构建和发布 npm 包到 GitHub Package Registry。","homepage":"https://github.com/harrisonwang/publish-to-gpr"}'
Step 3:克隆到本地
上面的命令将创建一个空白的库,我们使用以下命令将它克隆到本地:
1
$ git clone git@github.com:HarrisonWang/publish-to-gpr.git
Step 4:创建 index.js 文件
1
2
3
4
5
6
7
8
# 切换至 publish-to-gpr 目录
$ cd publish-to-gpr

# 创建 README.md 文件
$ echo "# publish-to-gpr" >> README.md

# 创建 index.js 文件
$ echo 'console.log("Hello GPR!");' >> index.js
Step 5:初始化 npm 包
初始化 npm,生成 package.json 文件:
1
2
3
4
5
6
7
$ npm init
...
package name: (publish-to-gpr) @harrisonwang/publish-to-gpr
...
test command: exit 0
...
Is this OK? (yes) yes
@harrisonwang/publish-to-gpr:npm 包前面加
@harrisonwang,代表 scopes 相关的包,可以理解为作用域包,作用域使我们创建和其他用户或组织的同名包,也不会发生冲突。
编辑 package.json 文件,添加以下配置设置要发布的 npm 包仓库和包作用域:
1
2
3
  "publishConfig": {
    "@harrisonwang:registry": "https://npm.pkg.github.com"
  }
Step 6:安装 npm 依赖包
生成 package-lock.json 文件:
1
$ npm i
Step 7:创建 GitHub Workflow 文件
新建 .github/workflows 目录:
1
$ mkdir -p .github/workflows/
创建 .github/workflows/publish.yml 文件,用于自动构建和发布 npm 包:
1
2
3
4
5
6
7
8
9
10
11
12
13
14
15
16
17
18
19
20
21
22
23
24
25
26
27
28
29
30
31
32
33
name: Node.js Package

on:
  release:
    types: [created]

jobs:
  build:
    runs-on: ubuntu-latest
    steps:
      - uses: actions/checkout@v4
      - uses: actions/setup-node@v3
        with:
          node-version: 16
      - run: npm ci
      - run: npm test

  publish-gpr:
    needs: build
    runs-on: ubuntu-latest
    permissions:
      packages: write
      contents: read
    steps:
      - uses: actions/checkout@v4
      - uses: actions/setup-node@v3
        with:
          node-version: 16
          registry-url: https://npm.pkg.github.com/
      - run: npm ci
      - run: npm publish
        env:
          NODE_AUTH_TOKEN: ${{secrets.GITHUB_TOKEN}}
Step 8:提交并推送至 GitHub
1
2
3
4
5
$ git add .

$ git commit -m "workflow to publish package"

$ git push
Step 9:创建 Tag 发布到 GPR
仓库首页点击 Create a new release:

创建 Tag:
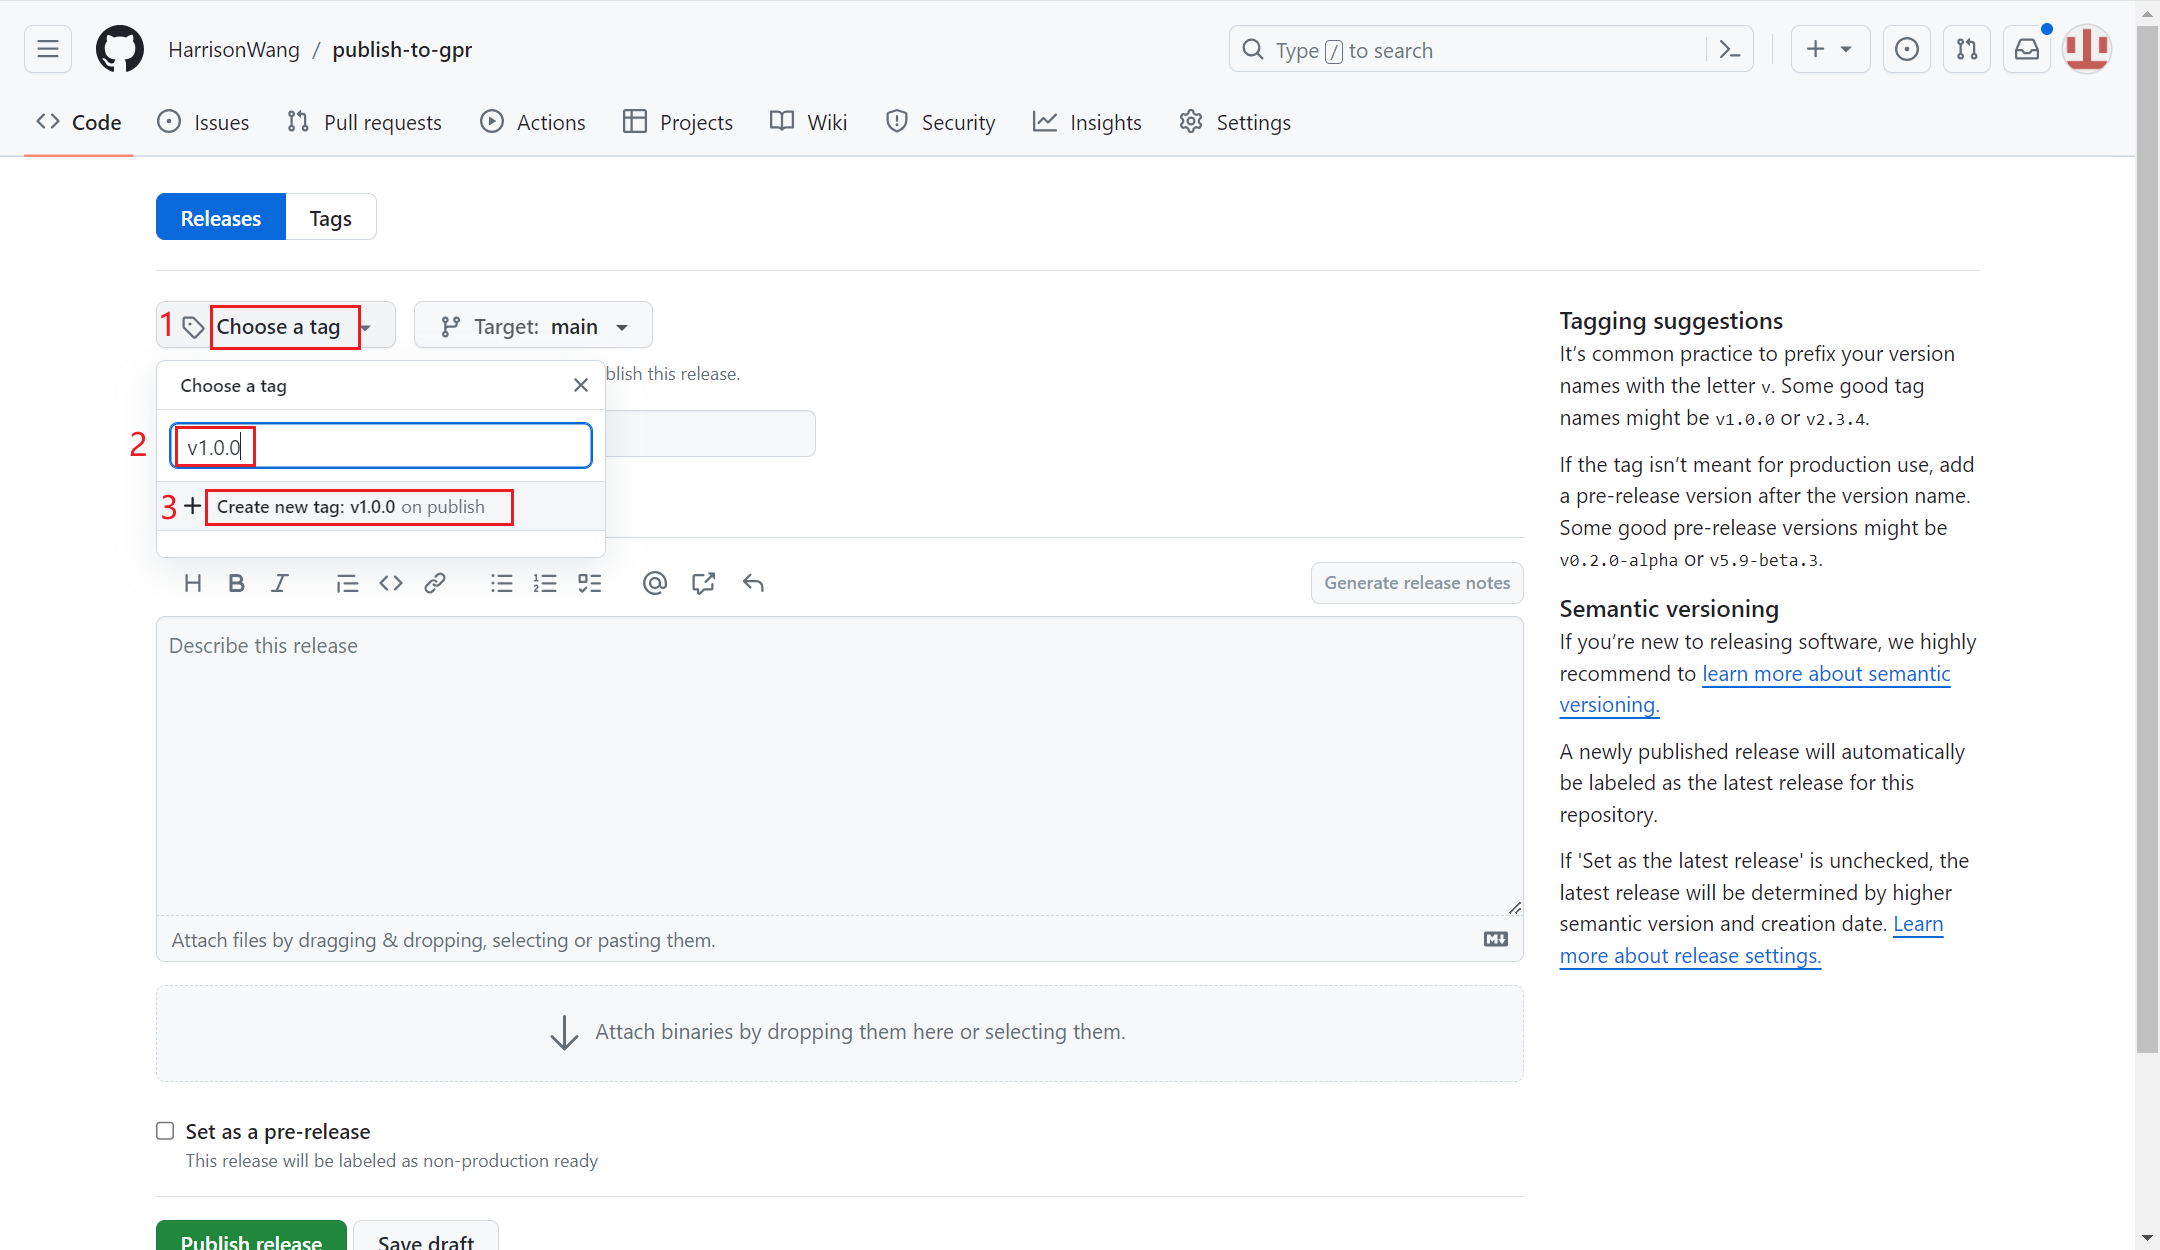
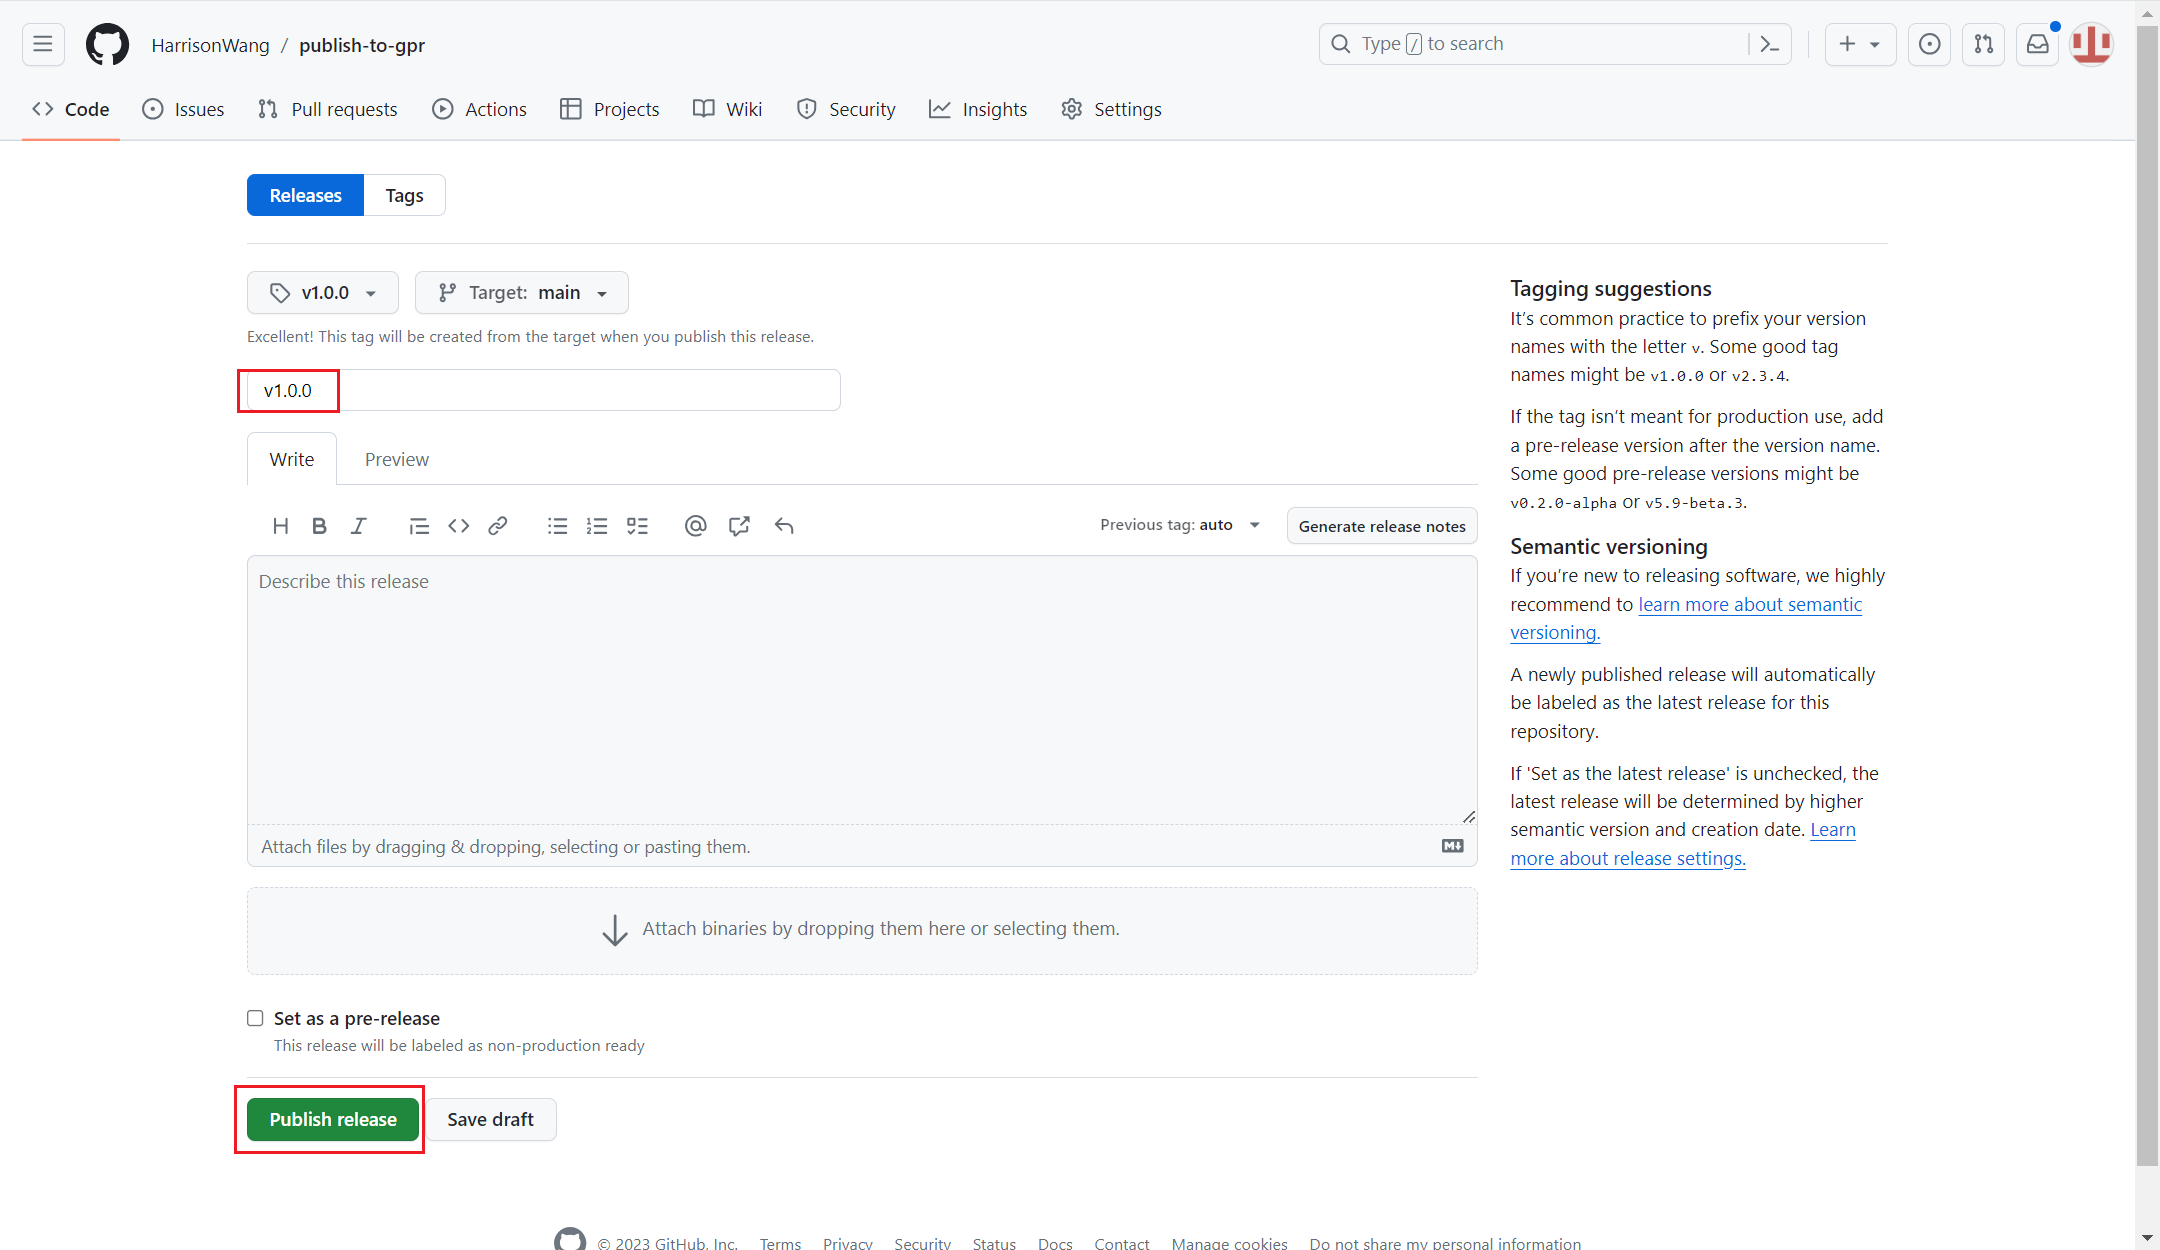
输入版本号点击 Publish release 发布:
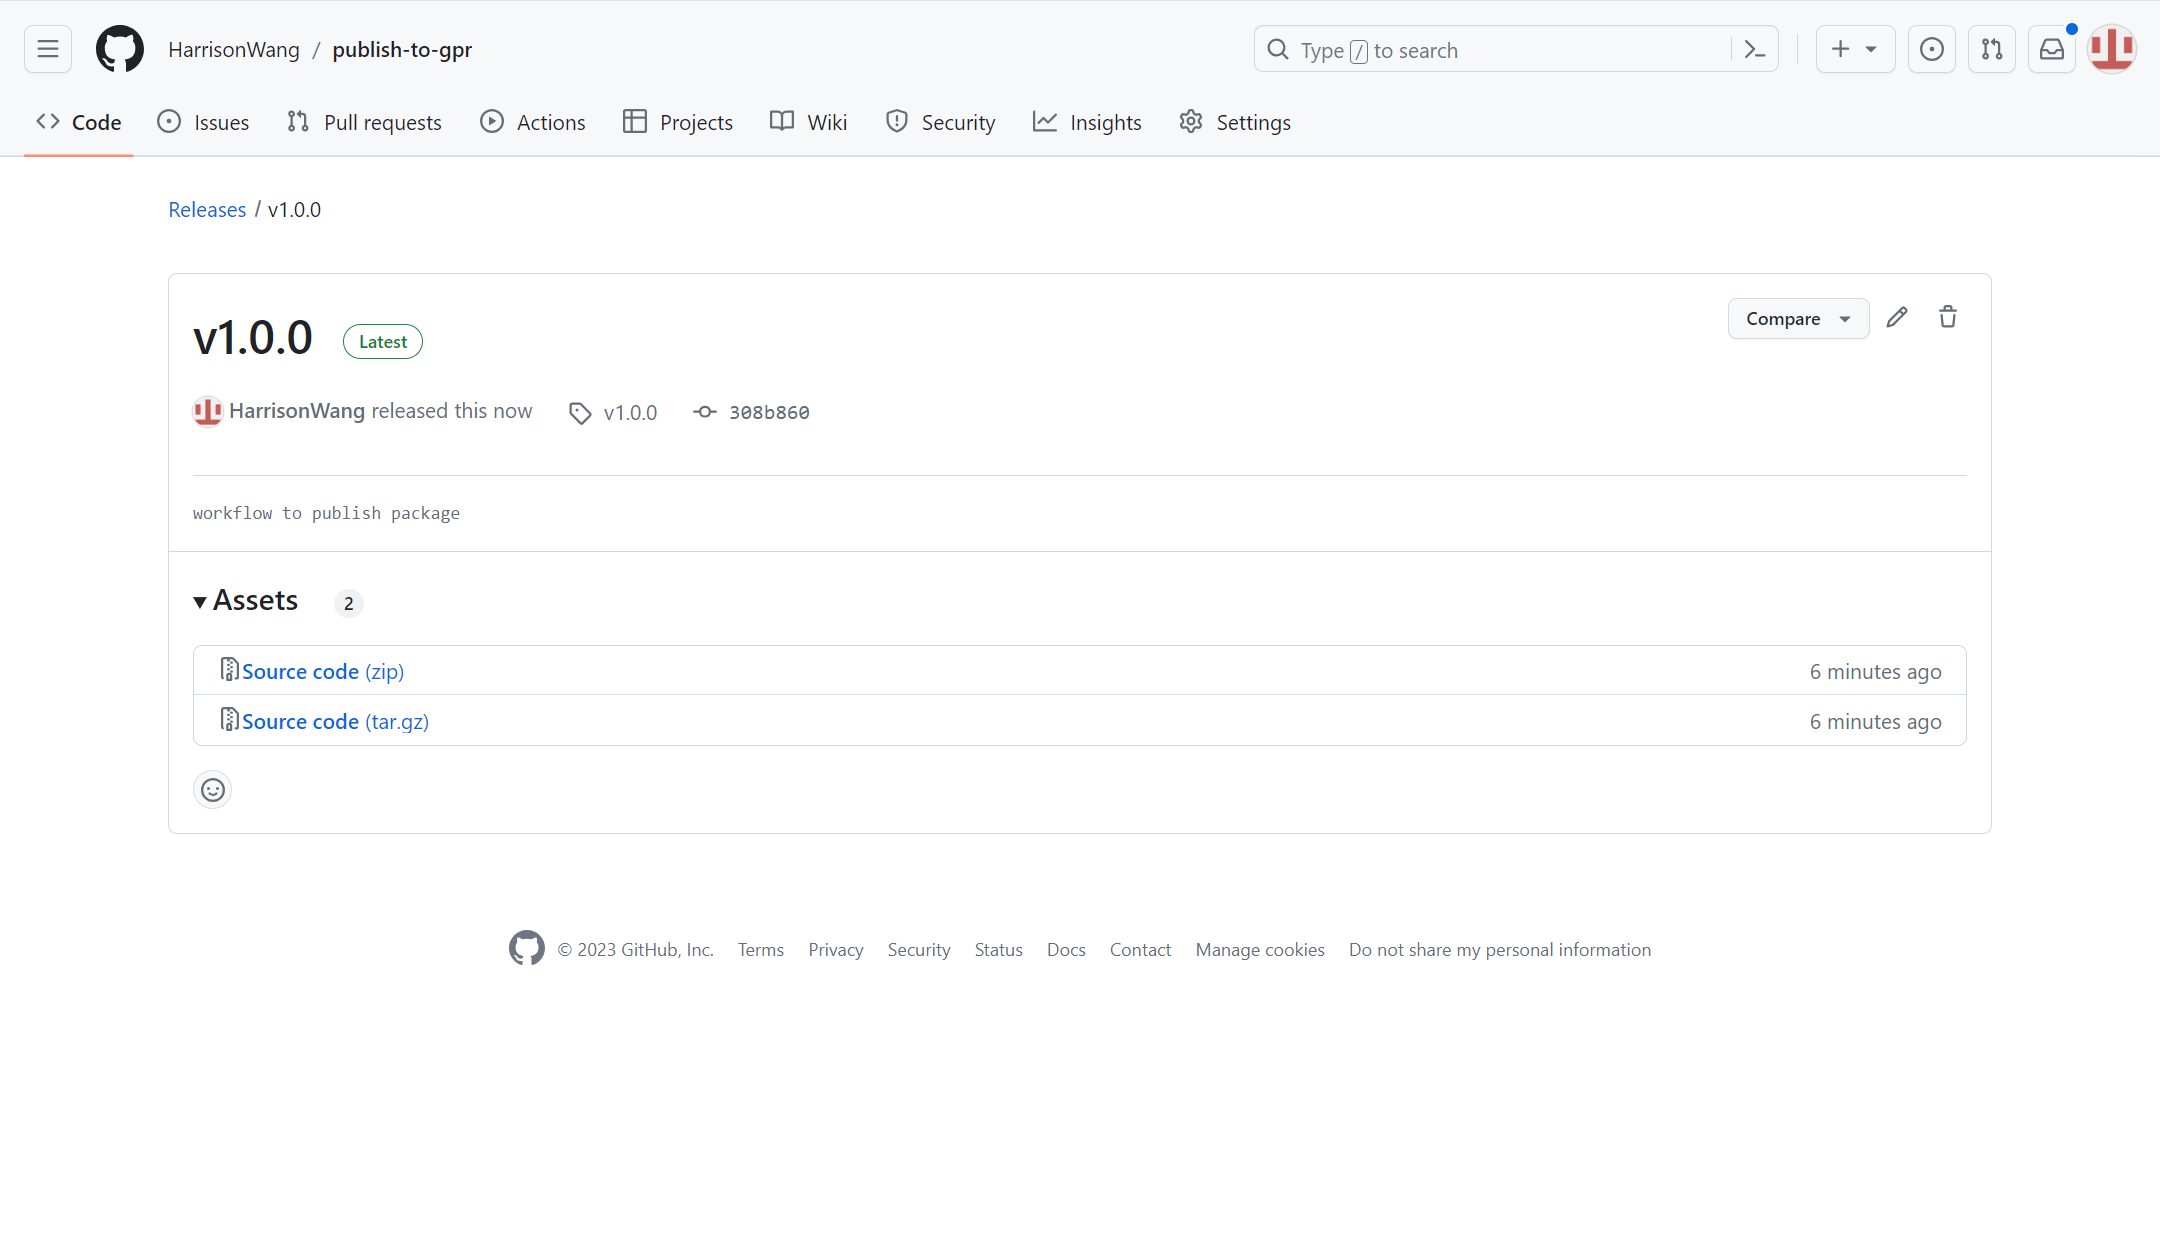
可以看到我们已经成功打包源代码包:
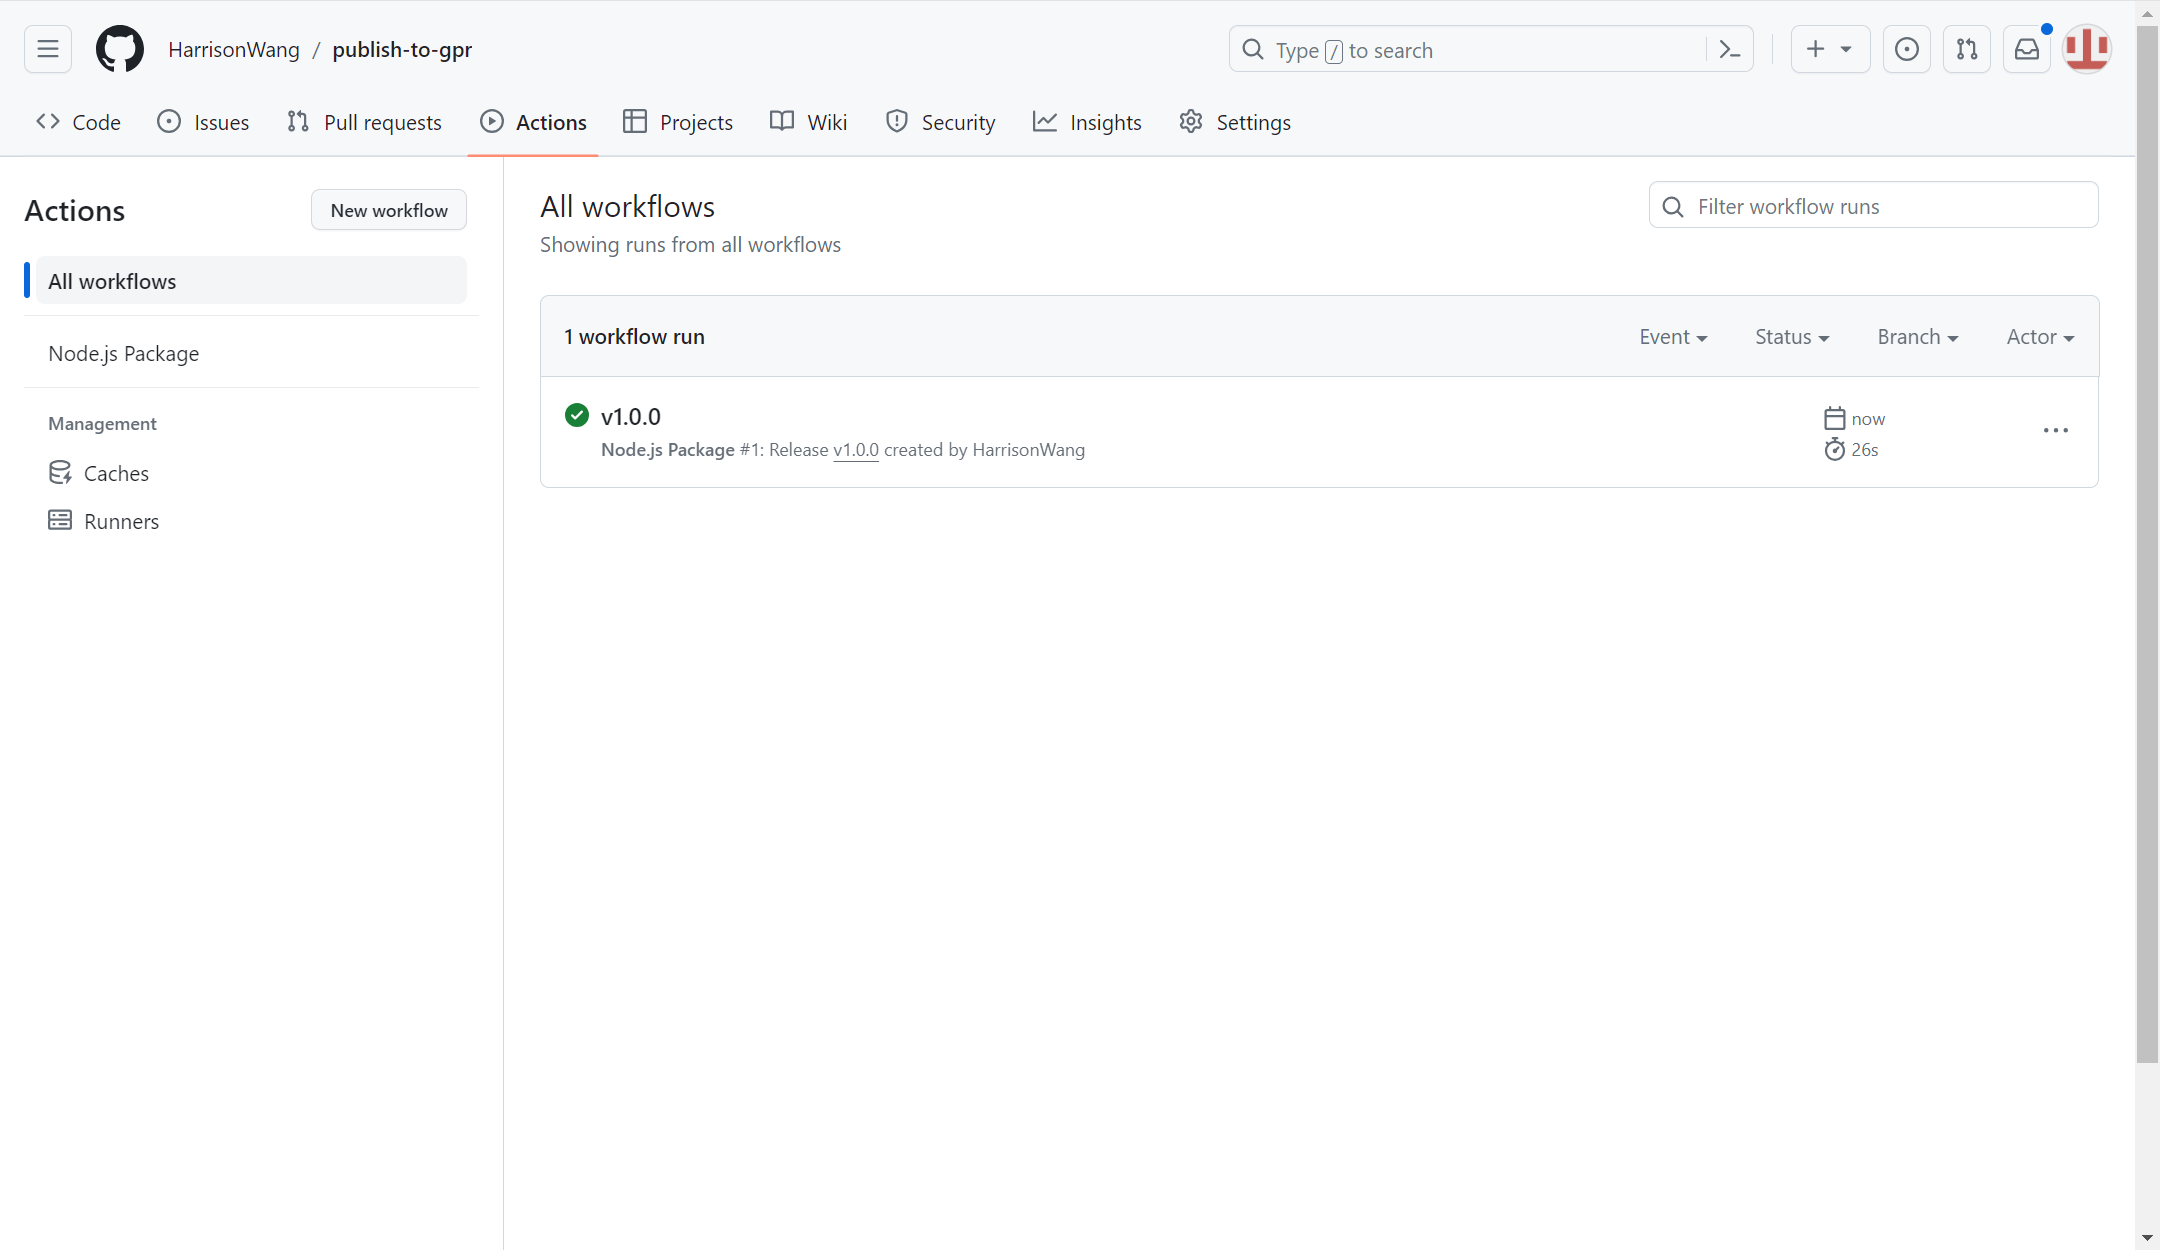
然后我们在 GitHub Actions 中查看 workflow 的运行情况,可以看到已运行成功:
至此,已成功发布到 npm 包到 GitHub Package Registry:

总结
GitHub 允许你在它上面构建、发布和访问 npm 包,使得你的包能够通过 GitHub Packages 进行集中管理和分发。
本文由作者按照 CC BY 4.0 进行授权