如何基于 Huxpro 搭建个人 GitHub 博客网站?
1.基于 huxpro 搭建个人 GitHub 博客站点
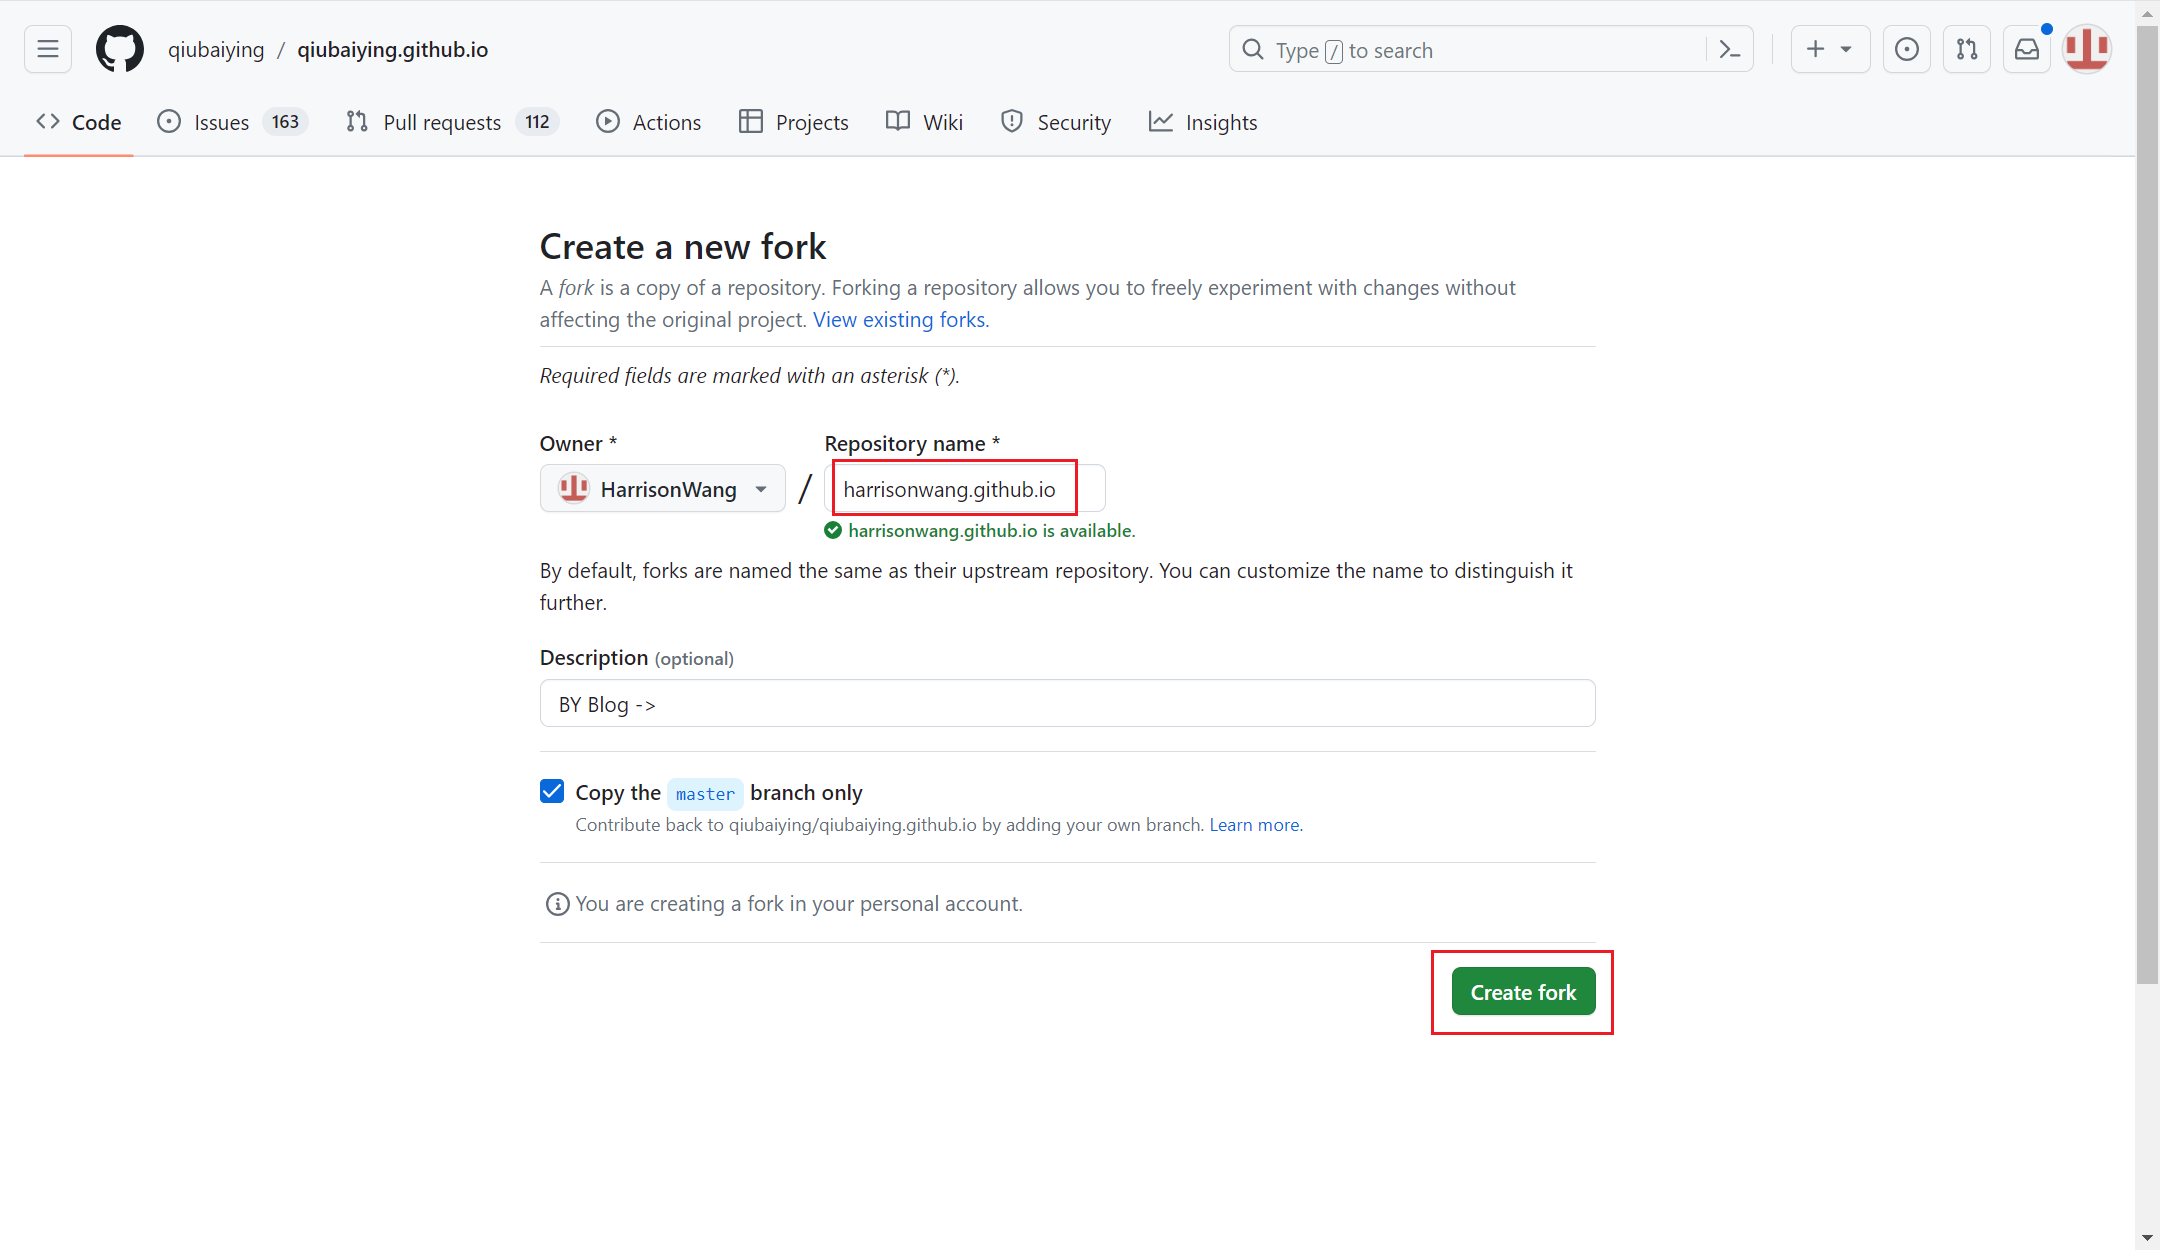
打开 https://github.com/huxpro/huxpro.github.io 开源的博客仓库,fork 到个人仓库:

修改仓库名称为 <user>.github.io,然后点击 Create fork:
Fork 完成后仓库如下:

Fork 完成后等待站点完成发布,最长可能需要 10 分钟才会发布,也可以通过 Github Actions 手动发布: 
发布完成后,我们可通过 <user>.github.io 地址访问,如 https://harrisonwang.github.io:

到此,基于 Github 的个人博客已搭建完成。
总结下,首先我们需要 fork 博客仓库模板 https://github.com/huxpro/huxpro.github.io 到自己仓库,然后修改仓库名称为 <user>.github.io,接着等待站点自动发布或者通过 Github Actions 手动完成发布,最后我们通过 https://<user>.github.io 即可成功访问。
2.使用个人域名
DNS 添加一条 CNAME 记录,例如我将 harrisonwang.github.io 个人博客站点绑定到个人域名 xiaowangye.org:

修改 GitHub 仓库下的 CNAME 文件,修改为个人域名 xiaowangye.org:

至此,GitHub 使用个人域名的配置已完成,我们可通过个人域名 xiaowang.org 访问到 GitHub 的个人博客站点。
3.使用个人域名和个人主机
有时候上面的方式可能无法满足我们的需求,这时候我们就需要使用个人主机和个人域名了,我们可以利用 GitHub Actions 的持续构建和持续发布能力,将博客文章自动发布到个人主机上。
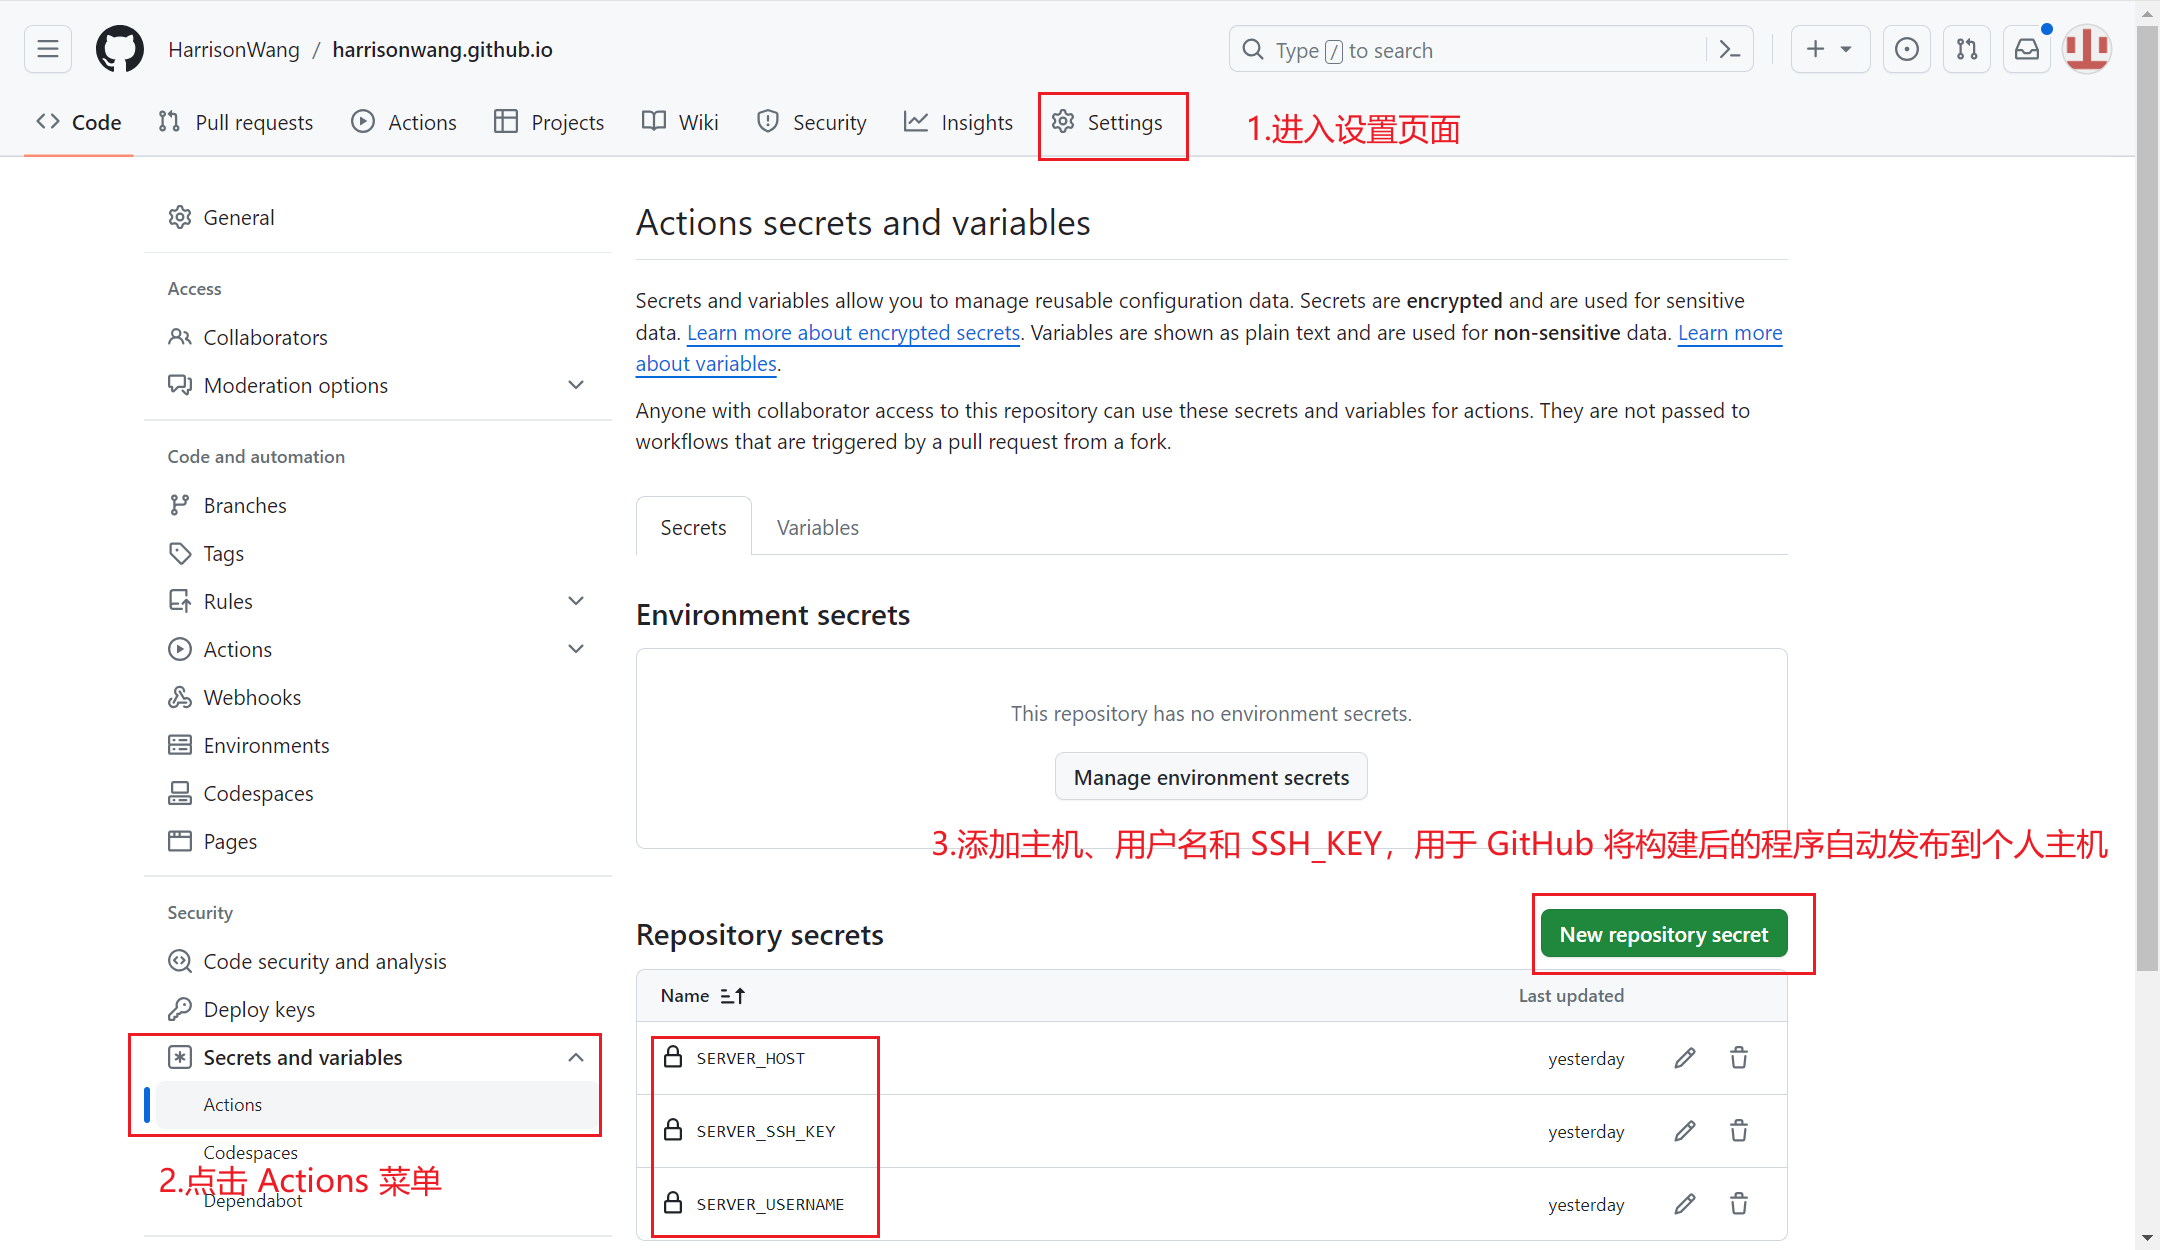
首先,我们需要将个人主机的 IP、主机用户名和主机私钥添加到 GitHub:
SERVER_SSH_KEY 需要在个人主机上生成,可通过下面的命令生成:
1
$ ssh-keygen -t rsa -b 4096 -C "harrisonwang@163.com" -f github-deploy-key
查看 .ssh 目录,可以看到生成了一个公钥 github-deploy-key.pub 和私钥文件 github-deploy-key:
1
2
3
4
5
6
7
$ ll ~/.ssh/
total 20
drwx------ 2 root root 4096 Dec 15 03:12 ./
drwx------ 8 root root 4096 Dec 15 03:11 ../
-rw------- 1 root root  746 Dec 15 03:11 authorized_keys
-rw------- 1 root root 3389 Dec 15 03:10 github-deploy-key
-rw-r--r-- 1 root root  746 Dec 15 03:10 github-deploy-key.pub
然后,我们将 公钥文件内容追加到 authorized_keys 文件里:
1
cat ~/.ssh/github-deploy-key.pub >> ~/.ssh/authorized_keys
查看 cat ~/.ssh/github-deploy-key 文件内容:
1
2
3
4
$ cat github-deploy-key
-----BEGIN OPENSSH PRIVATE KEY-----
...
-----END OPENSSH PRIVATE KEY-----
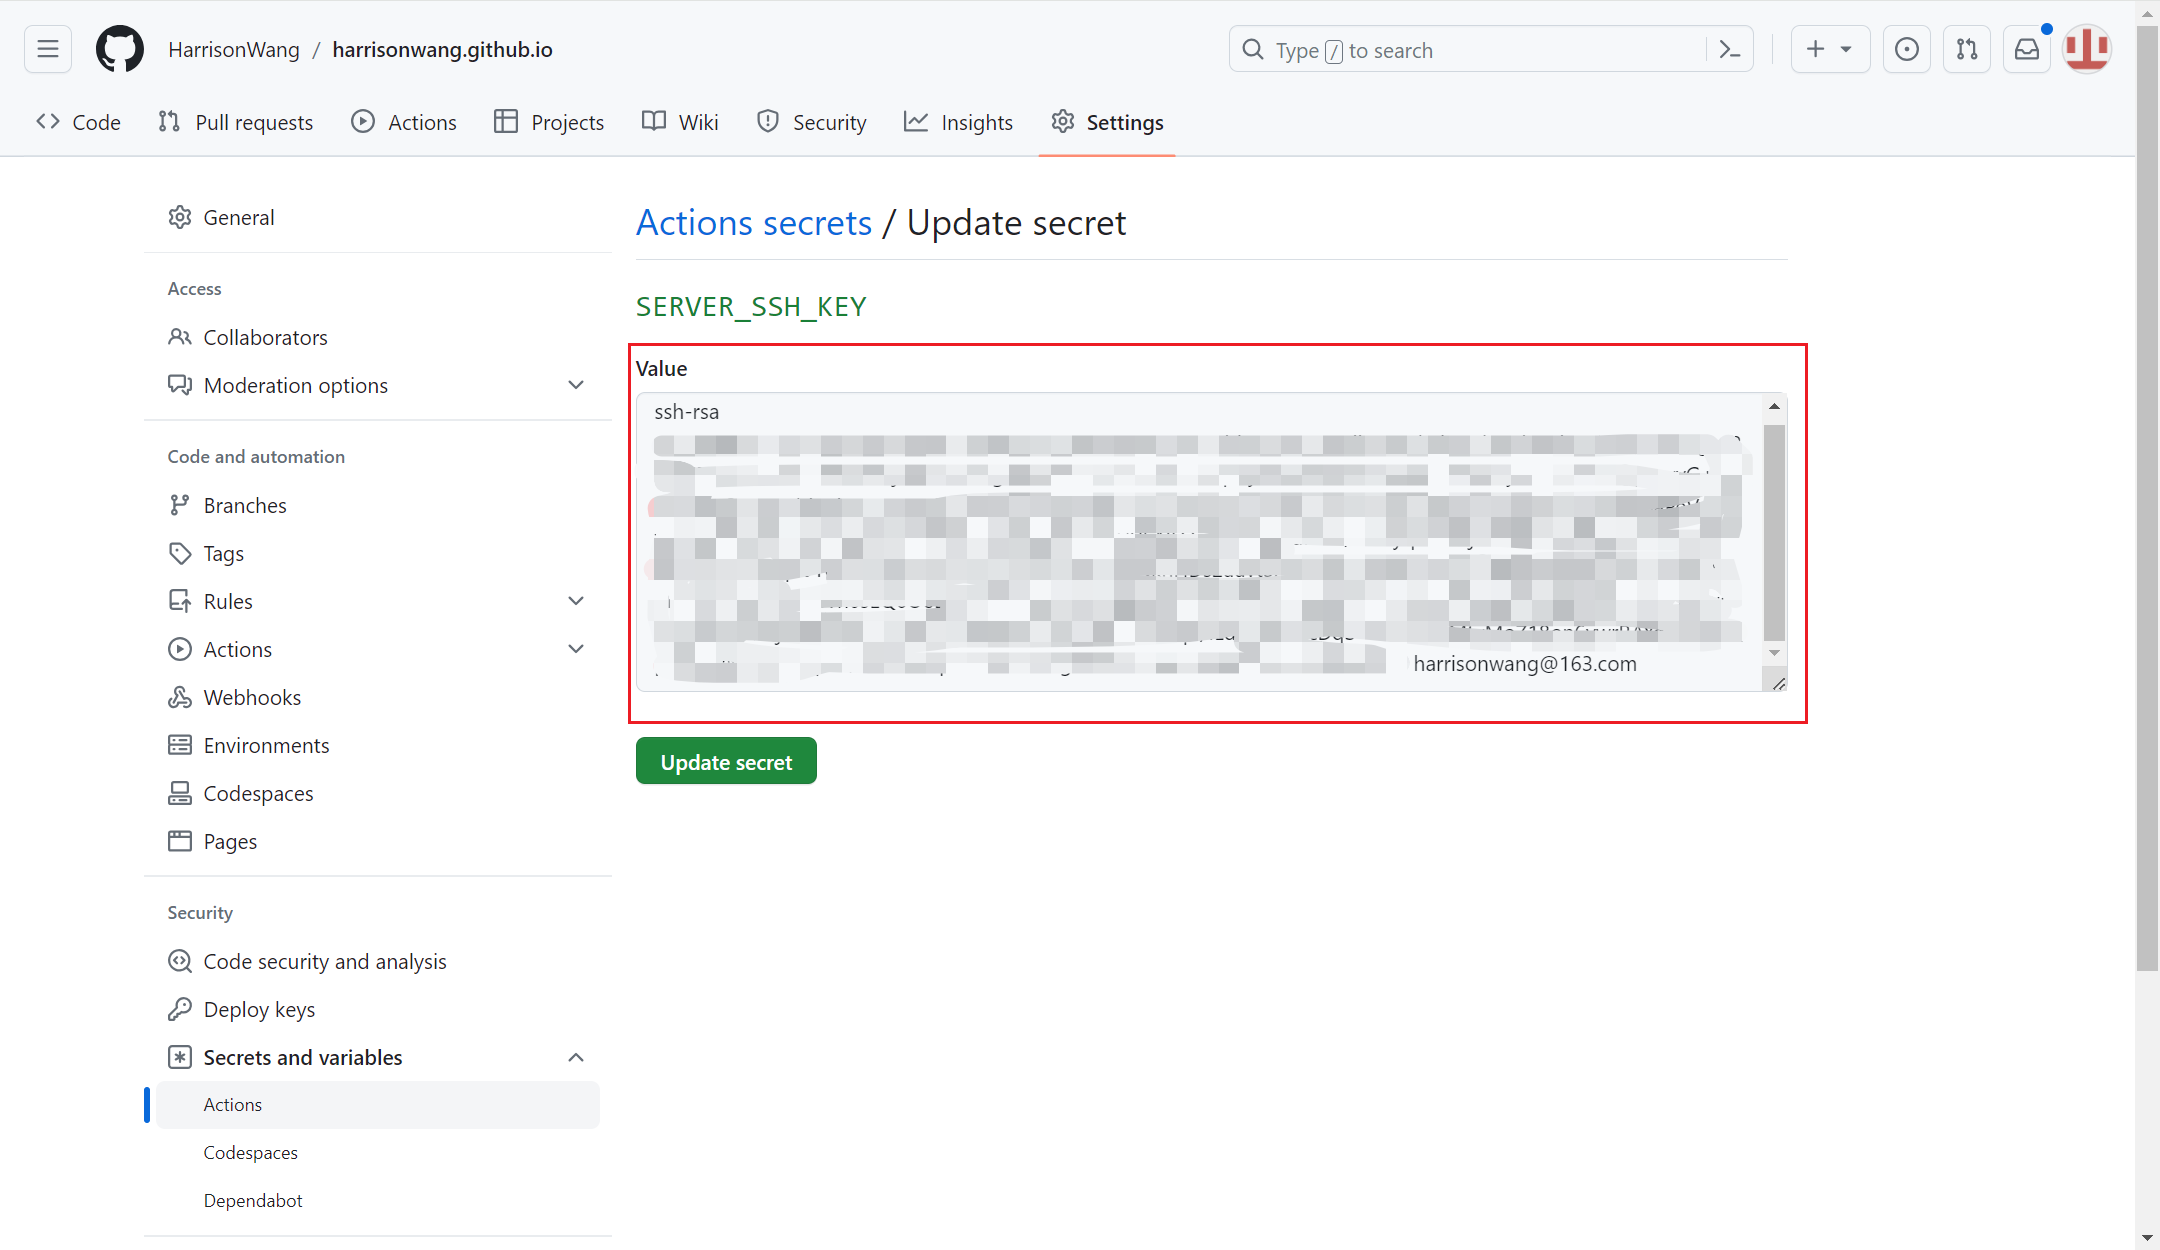
将个人主机生成的私钥内容设置到 SERVER_SSH_KEY:
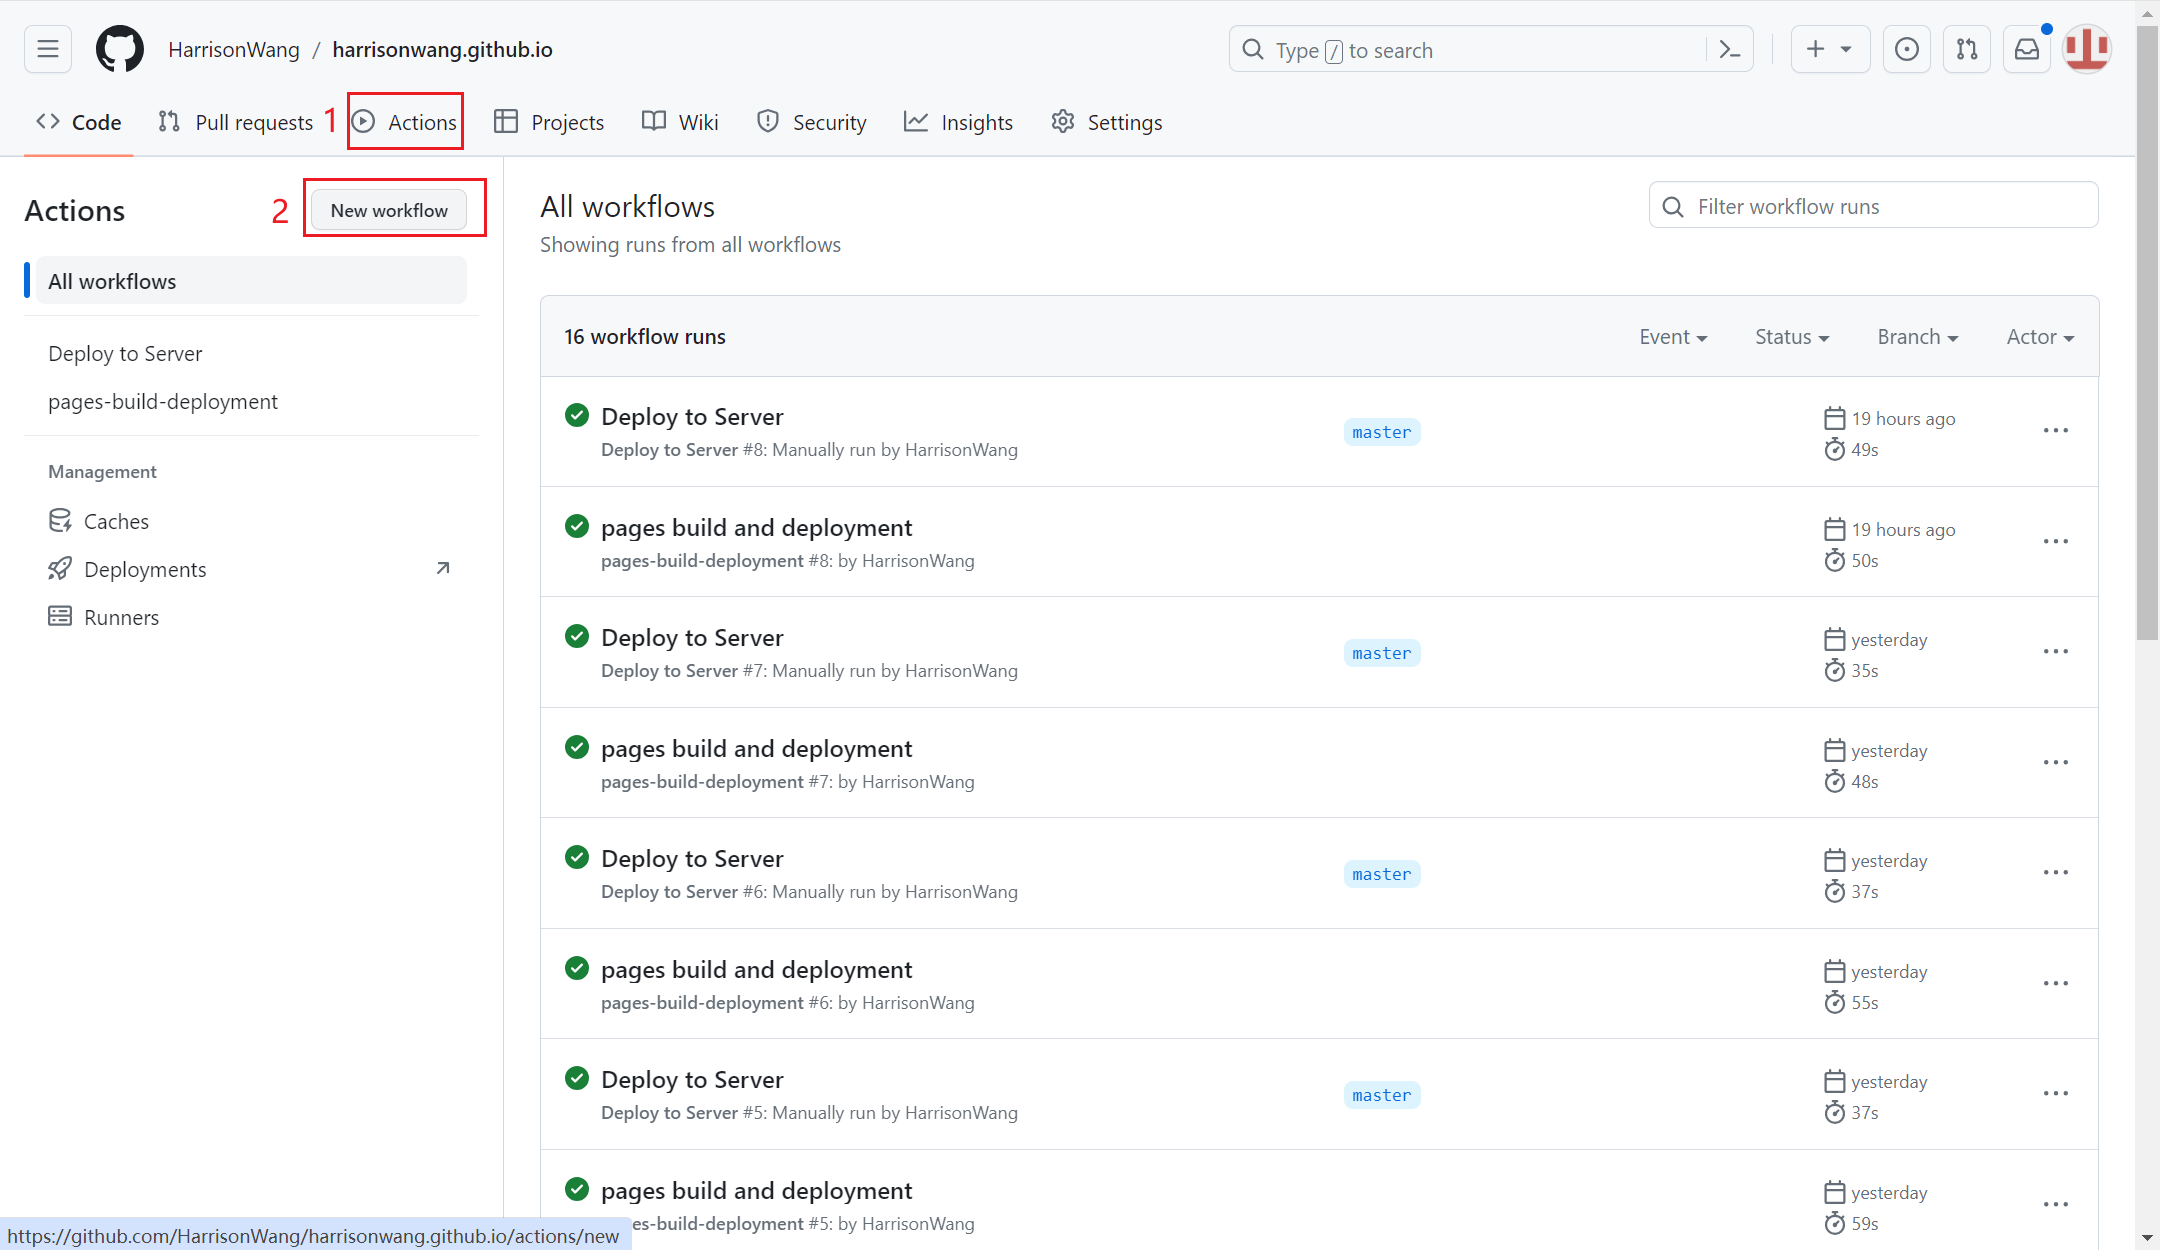
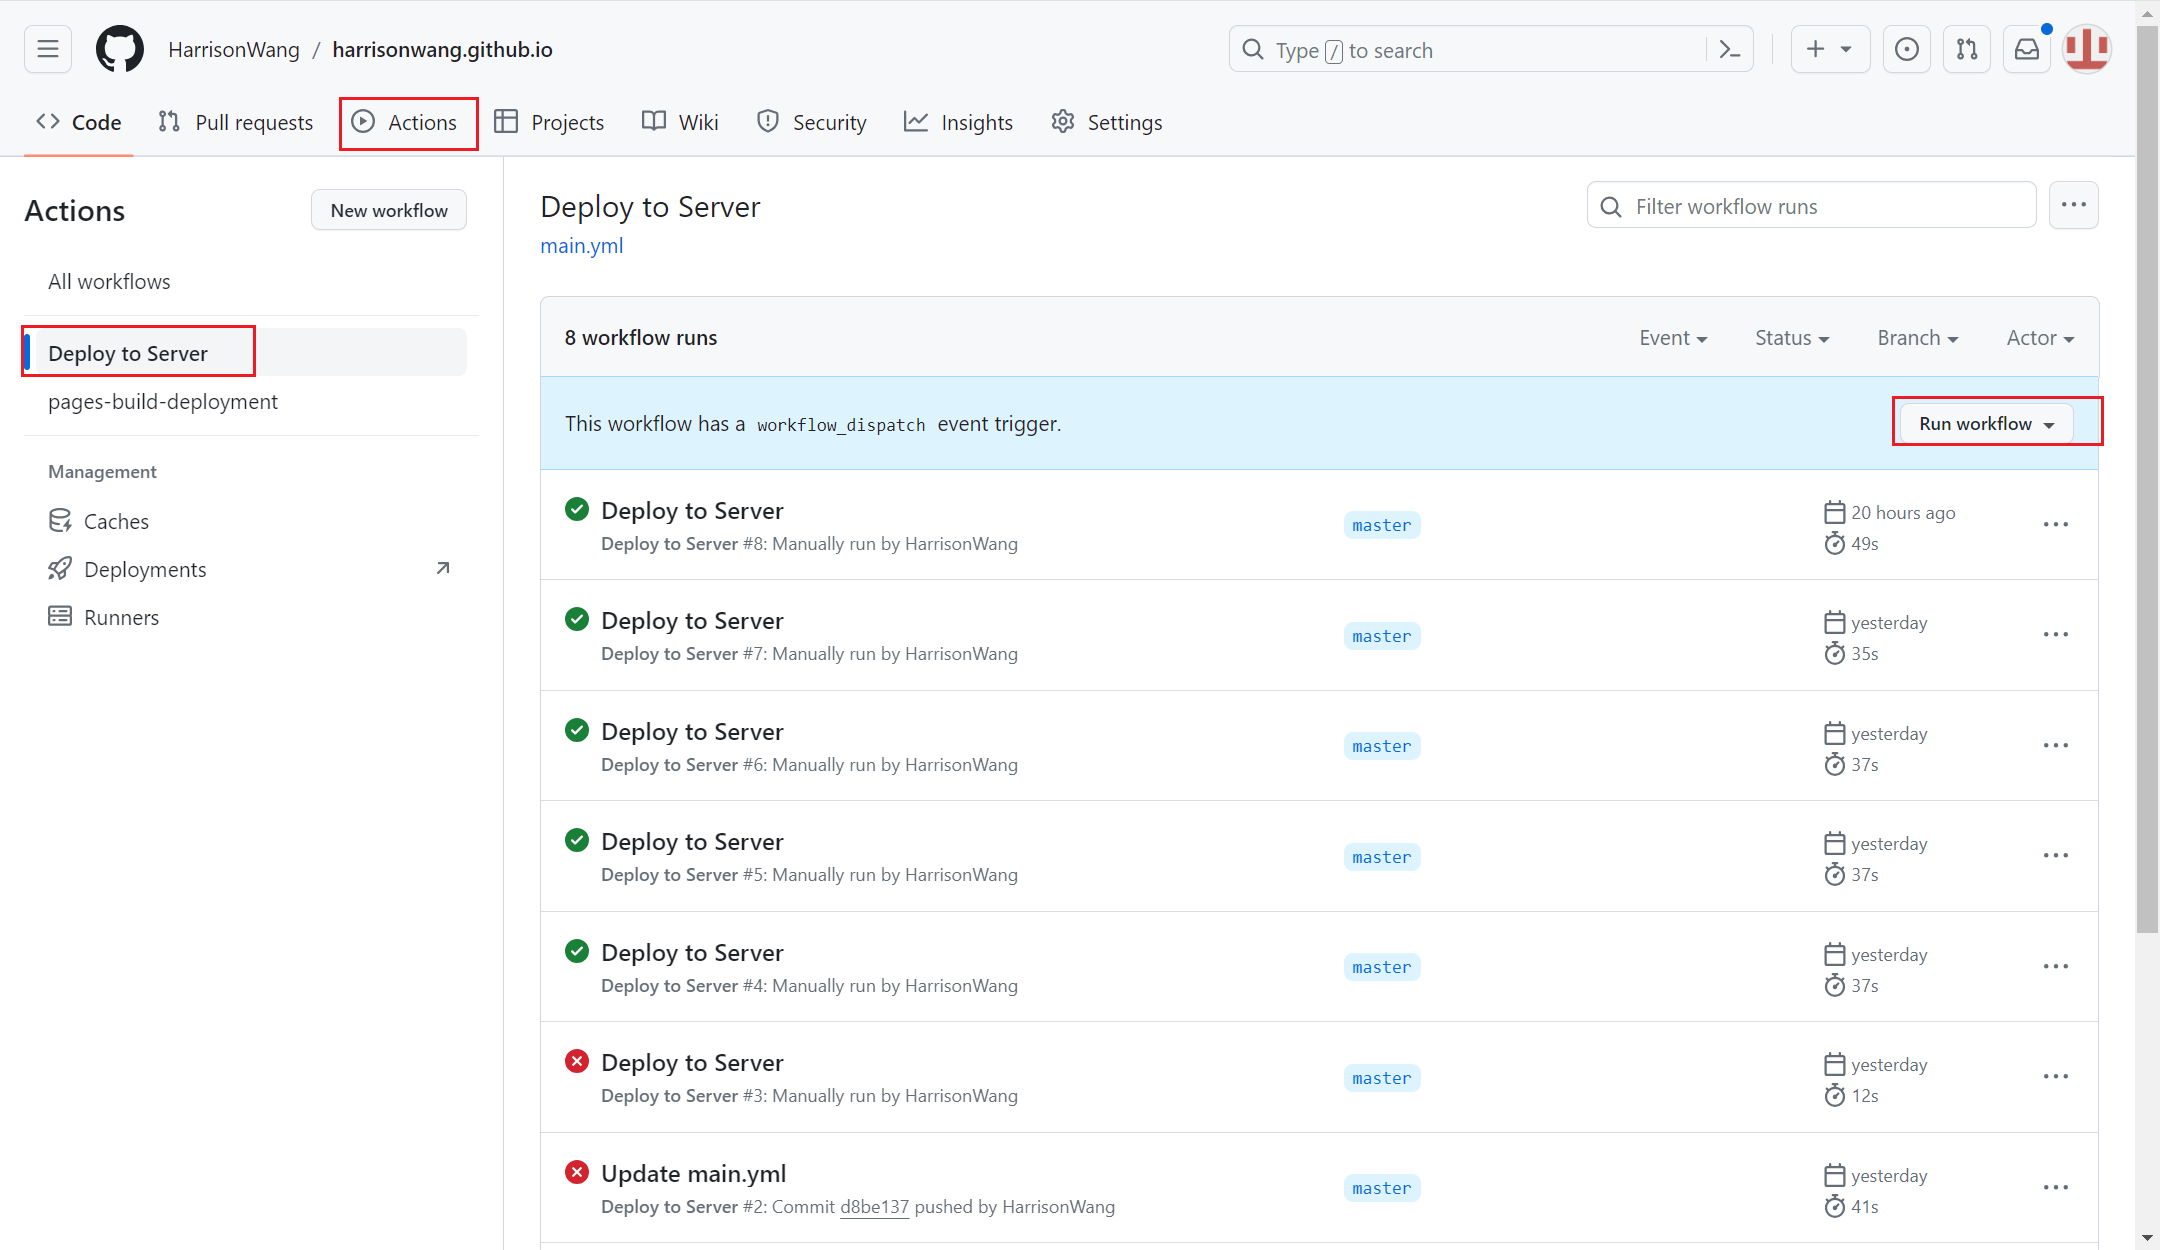
然后,然后我们需要在 GitHub Actions 上添加一个 workflow,用于持续构建并发布到目标个人主机。进入 Actions 页面点击 new workflow 新建:
以下是我编写的 workflow 脚本,用于将 GitHub 代码构建并发布至目标个人主机:
1
2
3
4
5
6
7
8
9
10
11
12
13
14
15
16
17
18
19
20
21
22
23
24
25
26
27
28
29
30
31
32
33
34
35
36
37
38
39
name: Deploy to Server

on:
  push:
    branches: ["main"]

  workflow_dispatch:

jobs:
  deploy:
    runs-on: ubuntu-22.04

    steps:
    - name: Checkout Repository
      uses: actions/checkout@v4

    - name: Set up Ruby and Bundler
      uses: ruby/setup-ruby@v1
      with:
        ruby-version: "3.2"
        bundler-cache: true

    - name: Install Dependencies
      run: |
        gem install bundler
        bundle install

    - name: Build Jekyll Site
      run: bundle exec jekyll build

    - name: Deploy to Server
      uses: appleboy/scp-action@master
      with:
        host: ${{ secrets.SERVER_HOST }}
        username: ${{ secrets.SERVER_USERNAME }}
        key: ${{ secrets.SERVER_SSH_KEY }}
        source: "_site/*"
        target: "/usr/share/nginx/html"
        strip_components: 1
此处的 strip_components: 1 指不包含 _site 目录,只拷贝其下面的文件和目录。
接着我们运行 workflow 进行自动构建和发布:
发布完成后,我们登录个人主机,可查看到 GitHub 自动发布的站点:
1
2
3
4
5
6
7
8
9
10
11
12
13
14
15
16
17
18
19
20
21
22
$ cd /usr/share/nginx/html/
$ ll
total 136
drwxr-xr-x 11 root      root  4096 Dec 14 06:06 ./
drwxr-xr-x  4 root      root  4096 Dec 12 08:17 ../
drwxr-xr-x  2 linuxuser  127  4096 Dec 14 06:06 2023-12-13-how-to-build-your-own-github-blog-site-with-huxpro/
-rw-r--r--  1 linuxuser  127 16330 Dec 14 06:06 404.html
drwxr-xr-x  2 linuxuser  127  4096 Dec 14 06:06 about/
drwxr-xr-x  2 linuxuser  127  4096 Dec 14 06:06 archive/
-rw-r--r--  1 linuxuser  127    15 Dec 14 06:06 CNAME
drwxr-xr-x  2 linuxuser  127  4096 Dec 14 06:06 css/
-rw-r--r--  1 linuxuser  127 15249 Dec 14 06:06 feed.xml
drwxr-xr-x  2 linuxuser  127  4096 Dec 14 06:06 fonts/
drwxr-xr-x  3 linuxuser  127  4096 Dec 14 06:06 images/
drwxr-xr-x  3 linuxuser  127  4096 Dec 14 06:06 img/
-rw-r--r--  1 linuxuser  127 19505 Dec 14 06:06 index.html
drwxr-xr-x  2 linuxuser  127  4096 Dec 14 06:06 js/
-rw-r--r--  1 linuxuser  127 16357 Dec 14 06:06 offline.html
drwxr-xr-x  3 linuxuser  127  4096 Dec 14 06:06 pwa/
-rw-r--r--  1 linuxuser  127  1732 Dec 14 06:06 Rakefile
-rw-r--r--  1 linuxuser  127   334 Dec 14 06:06 search.json
-rw-r--r--  1 linuxuser  127  9782 Dec 14 06:06 sw.js
至此,我们已成功使用个人域名和个人主机完成 GitHub 个人博客的自动发布。
4.本地调试
4.1.环境准备
安装 Ruby:
1
$ apt install ruby-dev
查看当前 RubyGems 源:
1
$ gem source -l
更换 RubyGems 源:
1
$ gem sources --add https://mirrors.tuna.tsinghua.edu.cn/rubygems --remove https://rubygems.org/
配置 bundle 源:
1
$ bundle config mirror.https://rubygems.org https://mirrors.tuna.tsinghua.edu.cn/rubygems
清空和更新源缓存:
1
2
3
$ gem sources -c

$ gem sources -u
安装 Jekyll 和 Bundler :
1
2
3
4
# 安装并查看显示日志
$ gem install jekyll --verbose

$ gem install bundler
4.2.克隆代码仓库
克隆代码仓库到本地:
1
$ git clone https://github.com/HarrisonWang/harrisonwang.github.io.git
执行以下命令启动:
1
$ jekyll s
打开 http://127.0.0.1:4000/ 地址预览效果如下:
5.使用 Typora 编写文章
我们在使用 Typora 写文章时,会碰到图片路径无法在网页正常显示的问题,具体参见:GitHub 博客图片路径配置。
按照文章思路,我们首先将 _config.yml 的 permalink 配置项修改为:
1
permalink: /:year-:month-:day-:title/
然后,我们到 Typora 中将图像路径设置为 /img/${filename}.assets/,设置见下图:
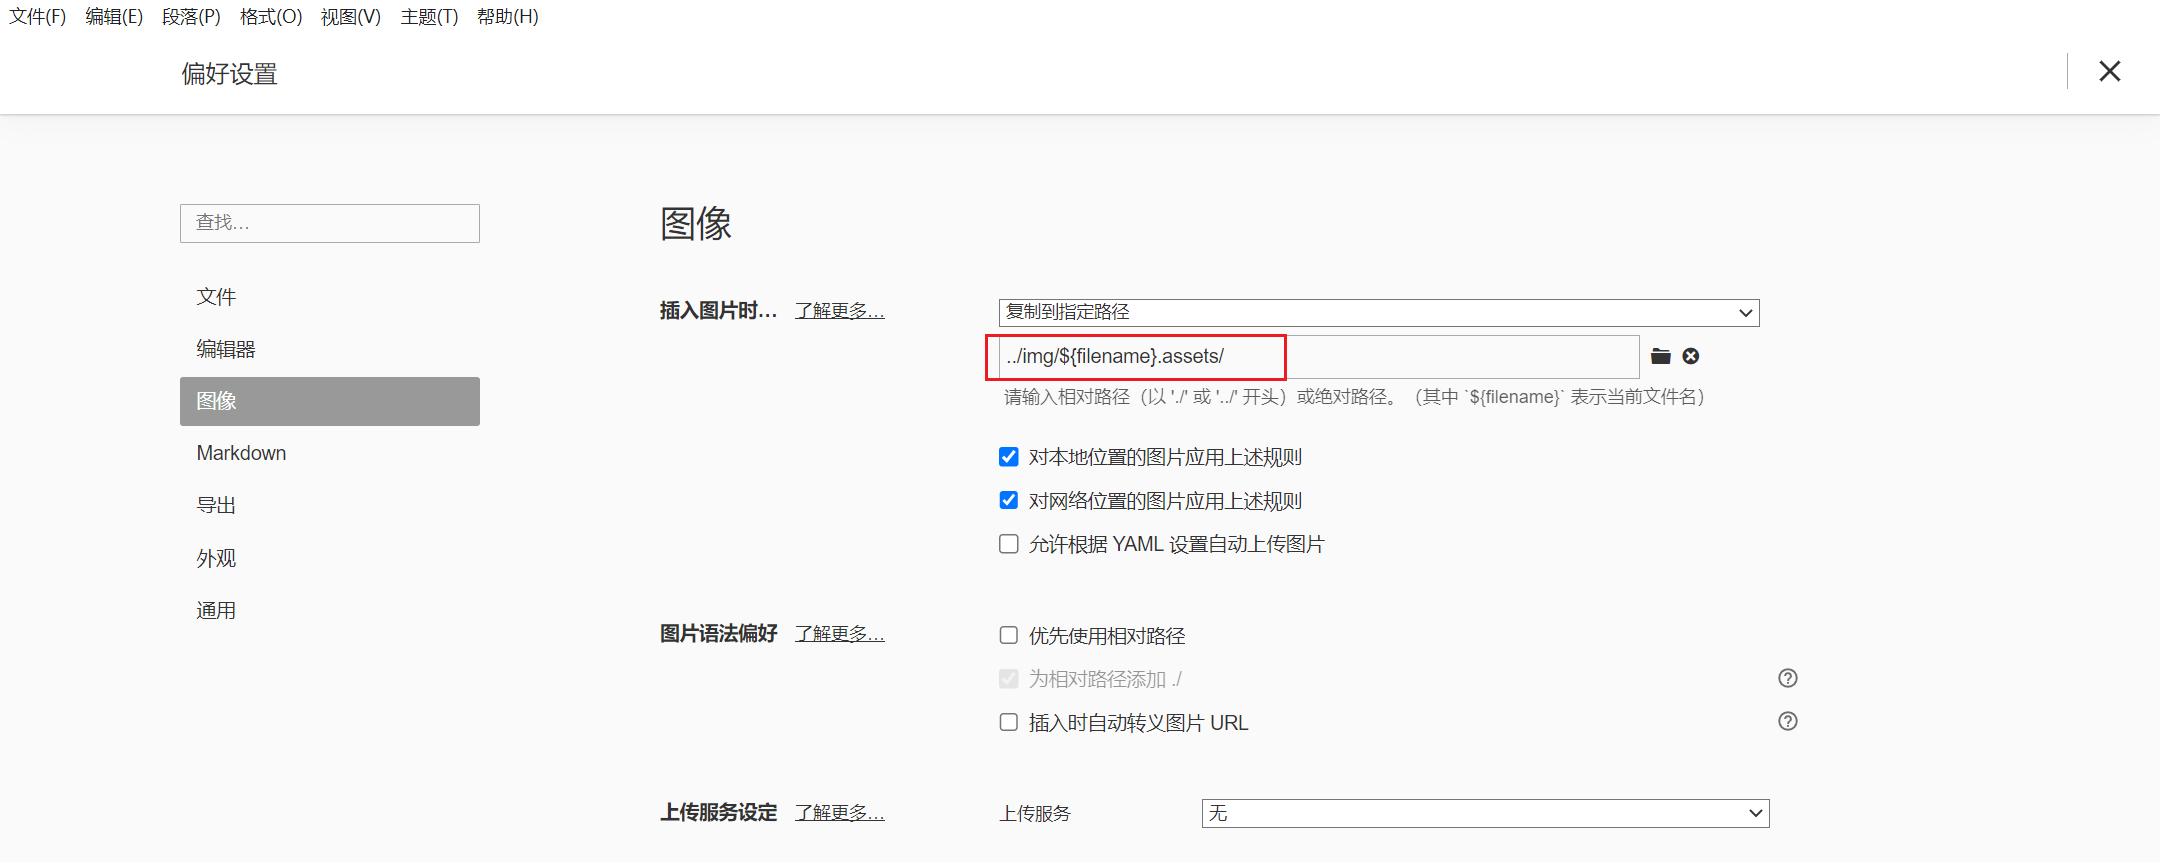
至此,我们就能方便的在 Typora 中编写文章了。